Bombay YMCA - Advance Booking
By Saloni on October 11, 2025
IntermediateAdvance Booking Check-In – User Guide
The Advance Booking Check-In process allows front-office staff to check in guests who have already made an advance reservation in the system. This ensures a smooth arrival experience and accurate room occupancy tracking.
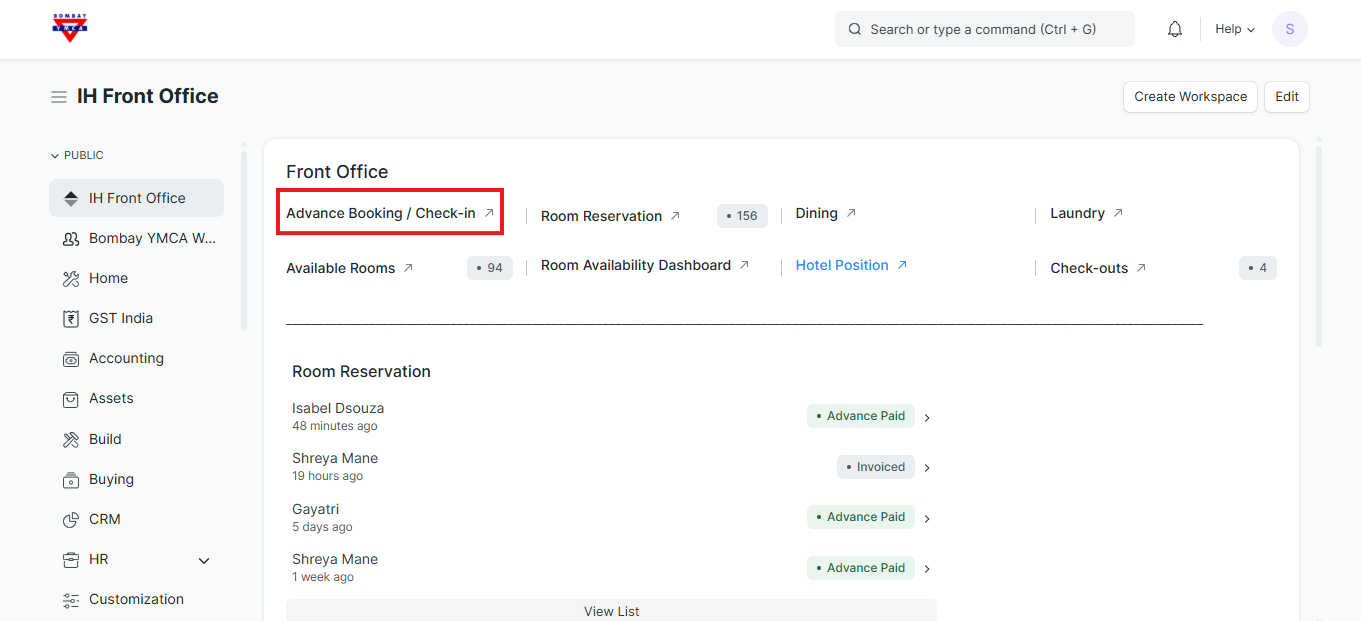
Adding a New Advance Booking
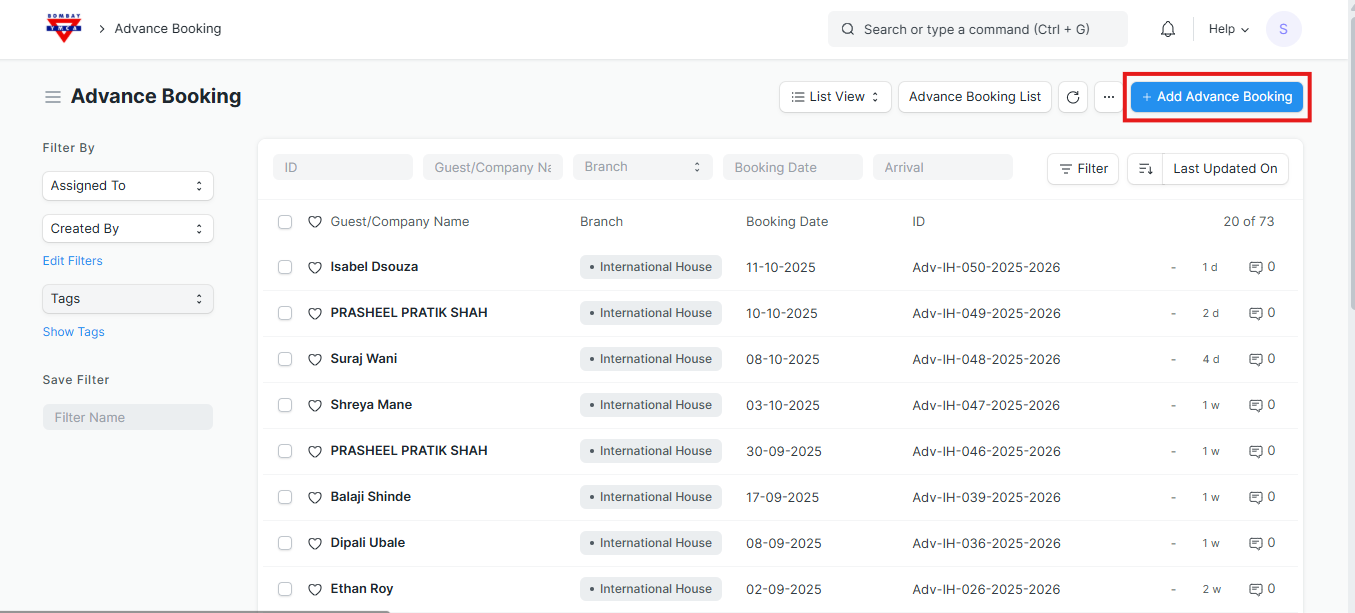
If a guest arrives and no prior booking exists:
- Click the + Add Advance Booking button in the top-right corner.
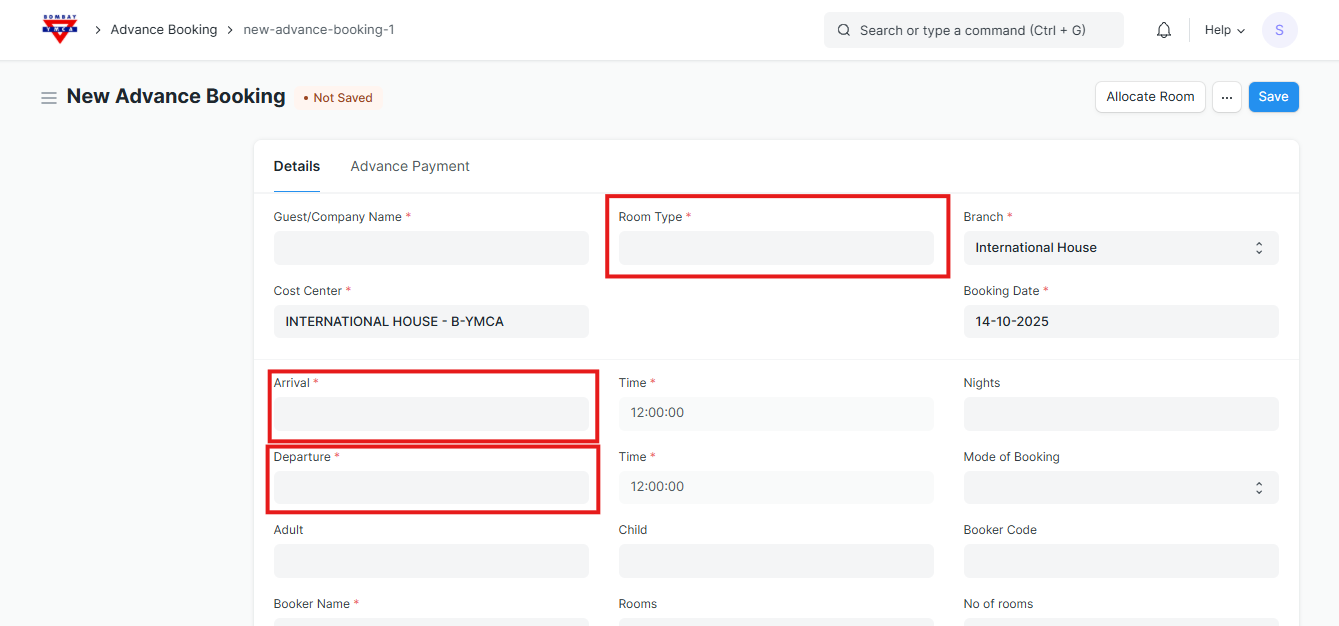
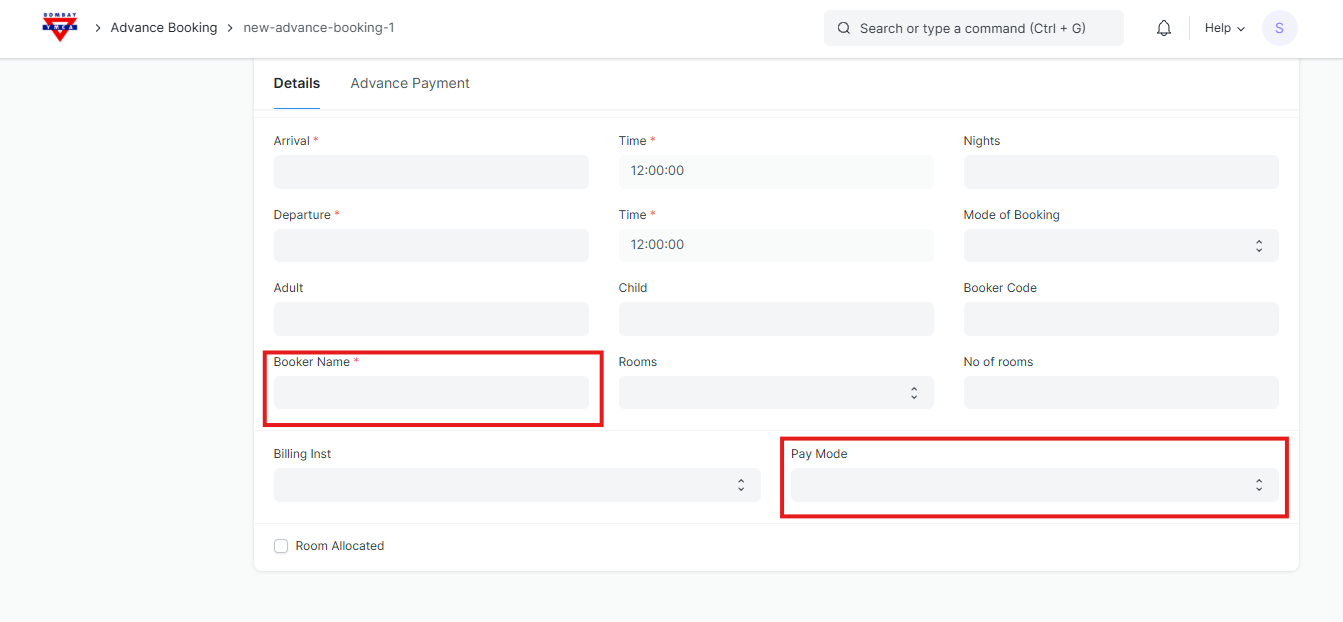
- Fill in all required booking details:
- Guest/Company Name
- Branch and Room Type
- Arrival and Departure Dates
- Mode of Booking (Email / Phone)
- Adults and Children count
- Record any Advance Payment details if the guest has paid in advance.
👤 Creating a New Customer (Individual)
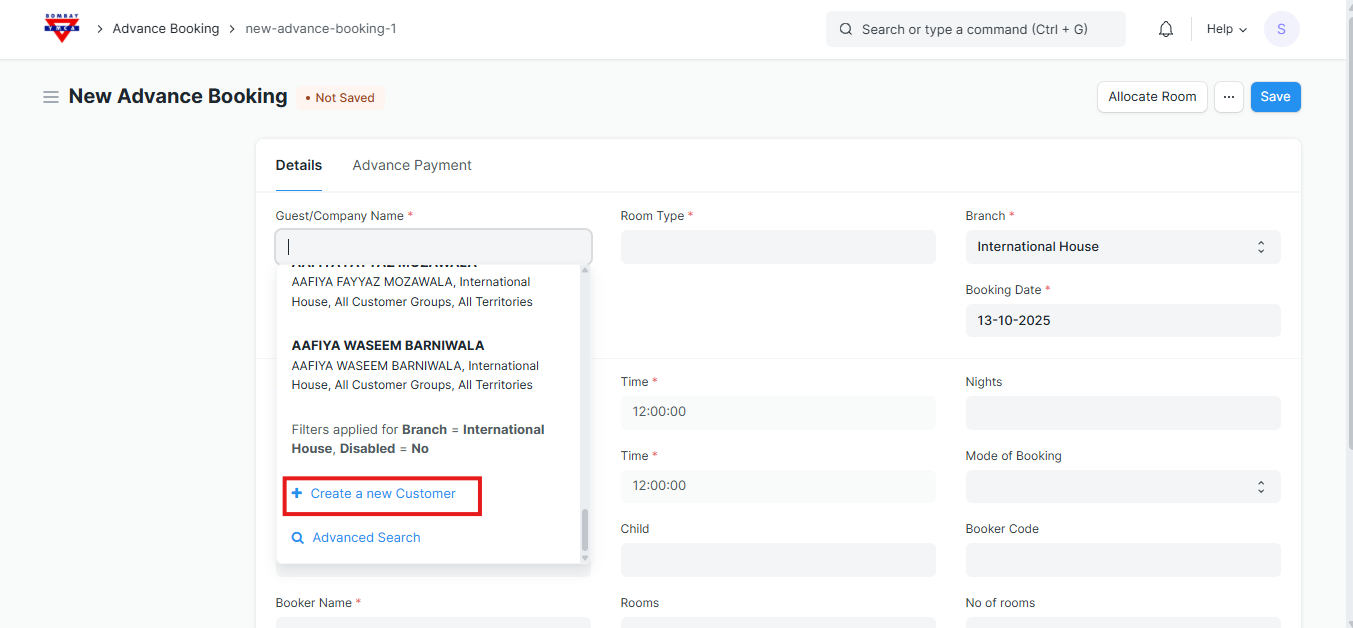
When making a new Advance Booking, if the guest name does not already exist in the system, you can create a new customer directly from the booking form.
Steps to Create a New Customer
In the Advance Booking form, click on the Customer Name field.
Click Create a New Customer (a pop-up will appear).
In the New Customer window:
- Enter the Customer Name (e.g., Joseph Augustine).
- Select Customer Type → Individual.
- Select Customer Group → Individual.
If you need to add more details, click Edit Full Form.
Once all details are filled, click Save.
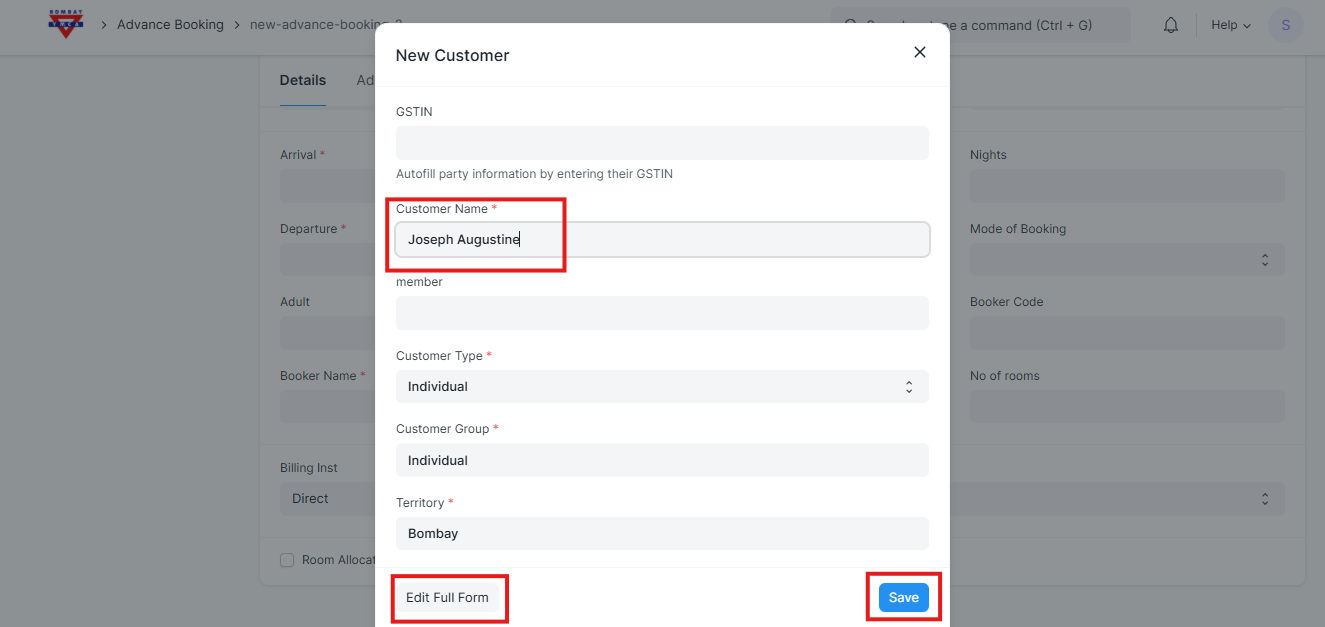
✅ The customer will now be created in the system and automatically linked to your Advance Booking form.
🧾 We Can Save Without Advance Payment
- Save the booking record
- Allocate the room
- even if the advance payment is not made yet.
The system will allow saving the form without an advance payment.

Enter Advance Payment Details
Fill in the following fields:
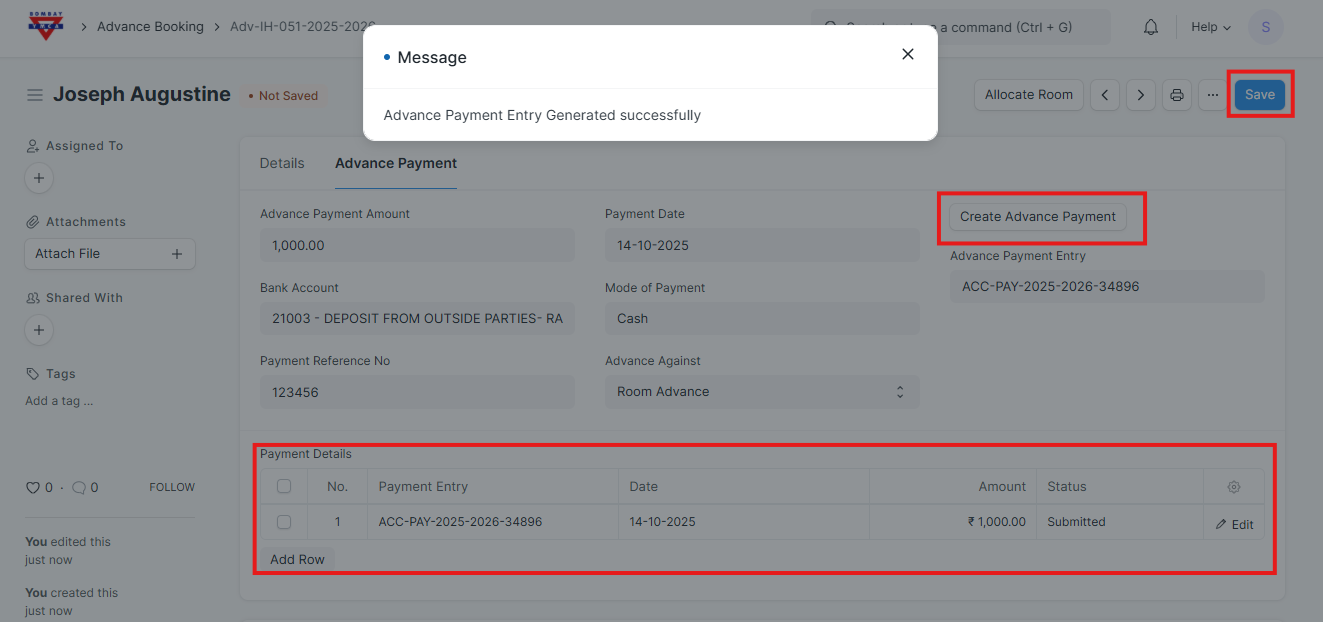
- Advance Payment Amount: Enter the amount received as advance.
- Payment Date: Select the date on which the payment is received.
- Mode of Payment: Choose the payment mode (e.g., Cash, Bank, UPI, etc.).
- Bank Account: Select the account where the amount will be deposited.
- Payment Reference No: Enter the reference number (e.g., transaction ID, cheque no.).
- Advance Against: Select the purpose (e.g., Room Advance).

- Once saved, click on the Create Advance Payment button.
- The system will automatically:
- Generate a Payment Entry (e.g.,
ACC-PAY-2025-2026-34896) - Link it to the booking under Advance Payment Entry
- Display the entry under Payment Details child table
🟩 A success message will appear at the top:
Message: Advance Payment Entry Generated Successfully
🏢 Creating a New Customer (Company)
When booking a room for a company or organization, you can add a new customer directly from the Advance Booking form.
Steps to Create a Company Customer
In the Advance Booking form, click inside the Guest/Company Name field.
Select Create a New Customer.
A pop-up window titled New Customer will open.
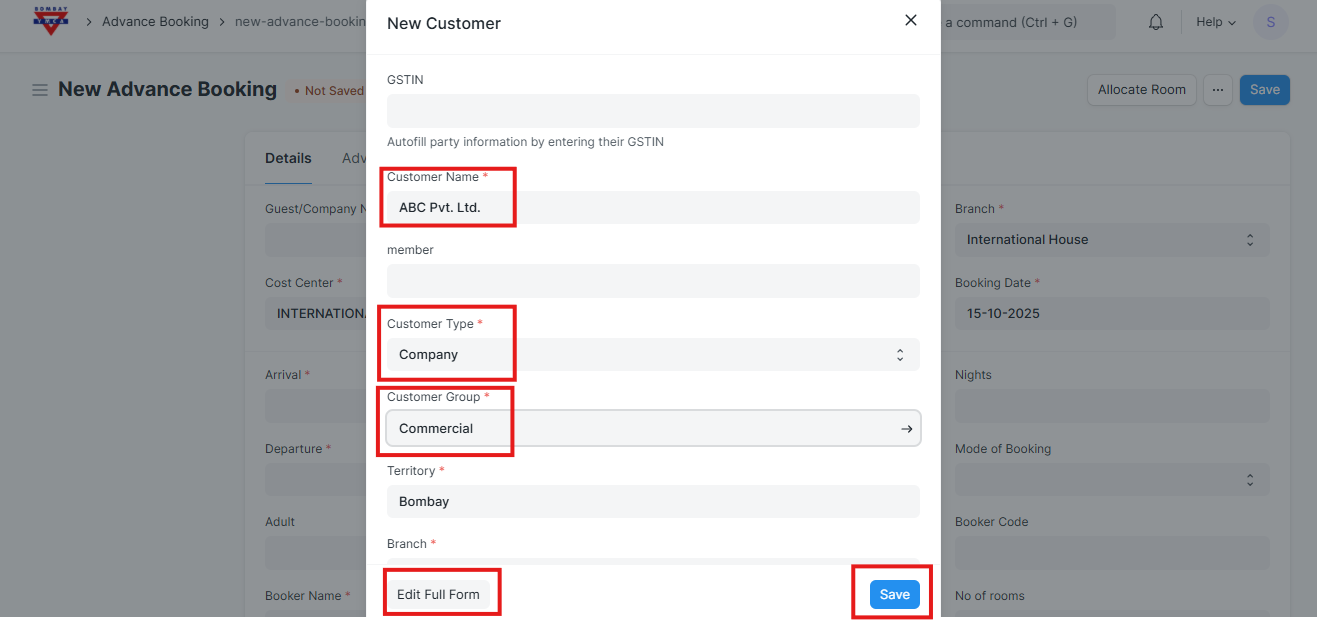
Fill in the details as shown in the screenshot:
- Customer Name → Enter the company name (example: ABC Pvt. Ltd.)
- Customer Type → Select Company
- Customer Group → Choose Commercial or the appropriate group
- Territory → Select the company’s region (example: Bombay)
- Branch → Choose the correct branch (example: International House)
If you want to add more company details (like address, GSTIN, or contacts), click Edit Full Form.
Once done, click Save.
✅ After saving, the Company Customer will be created and automatically linked to your Advance Booking record.
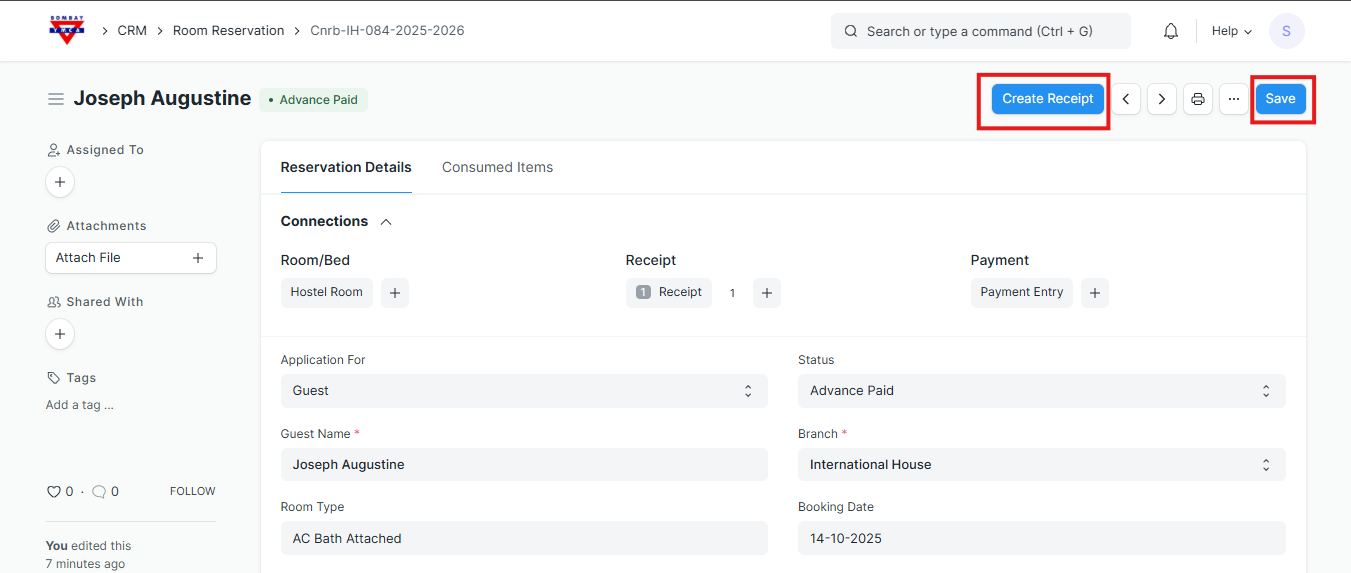
After Advance Booking — Allocate Room & Create Receipt
Once the Advance Booking is completed, you can allocate that booking to a Room Reservation and then create a Receipt for payment.
Steps to Allocate and Create Receipt
Open the Room Reservation form.
In the Advance Booking field, select the booking you created earlier (for example: Adv-IH-051-2025-2026).
The system will automatically fill in details such as:
- Guest Name
- Room Type
- Branch
- Booking Type
- Total Amount
Once the details are verified, click on the Save button.
After saving, click the Create Receipt button on the top-right corner.
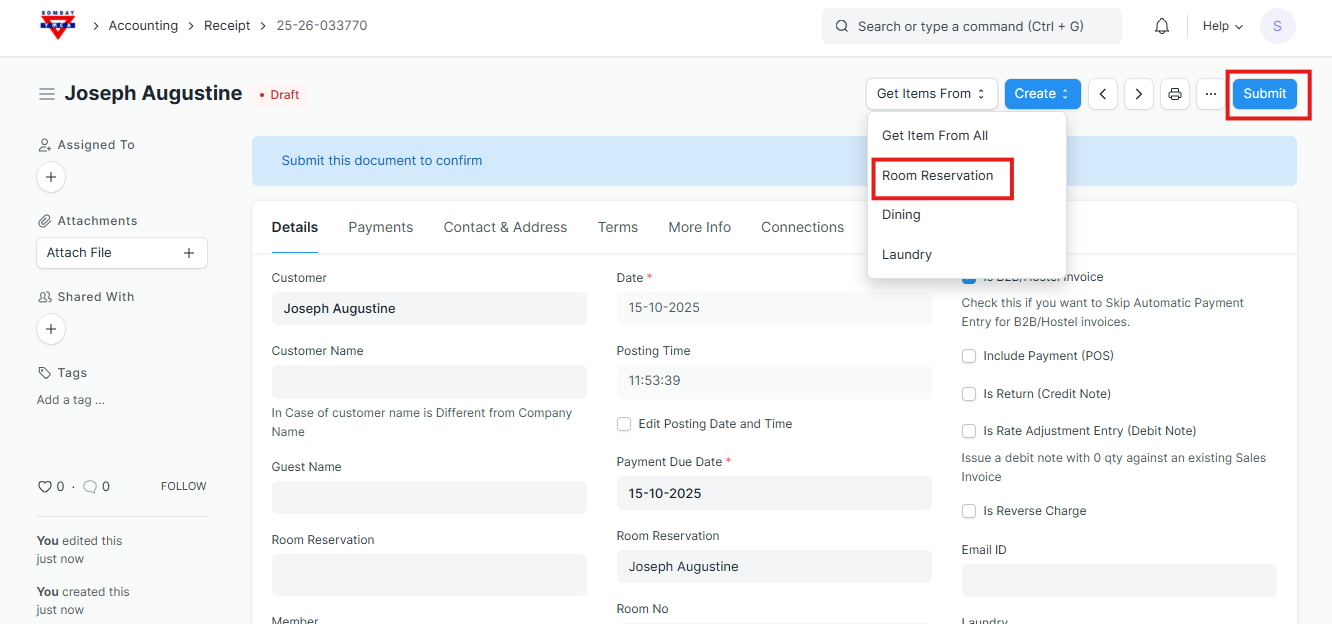
A new Receipt Form will open with the booking details pre-filled.
Review the details and click Save.
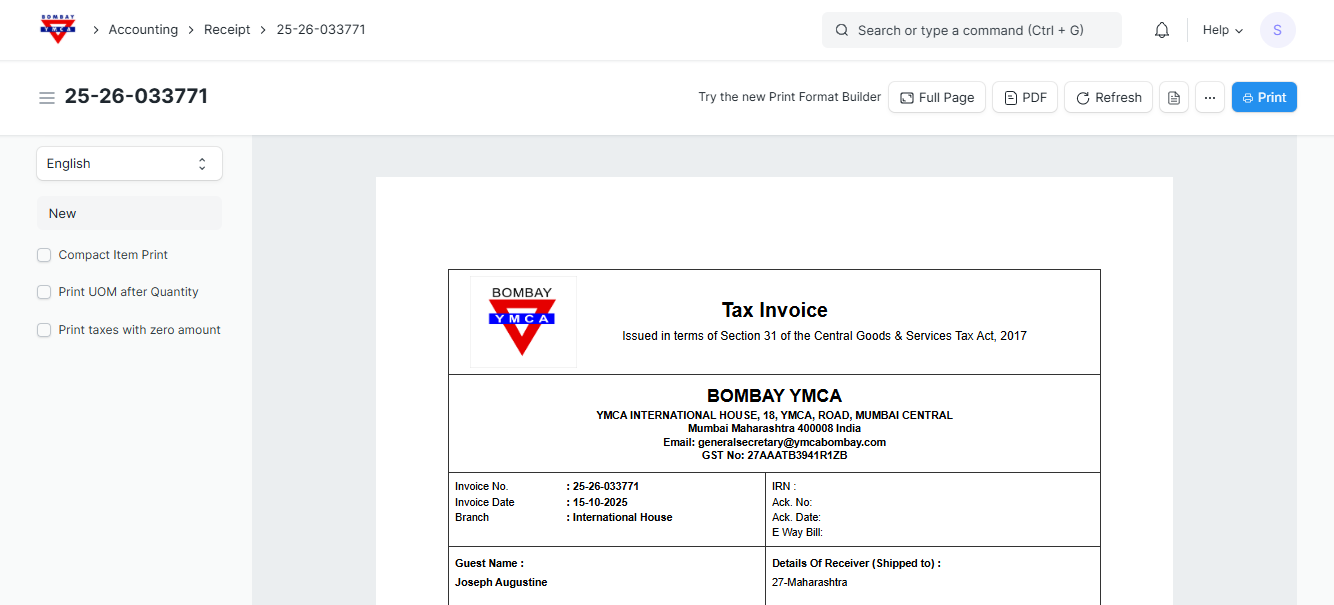
✅ The receipt will now be created and linked to the Room Reservation.
***********************END of the Process***********************************
More articles on IH Guest Booking